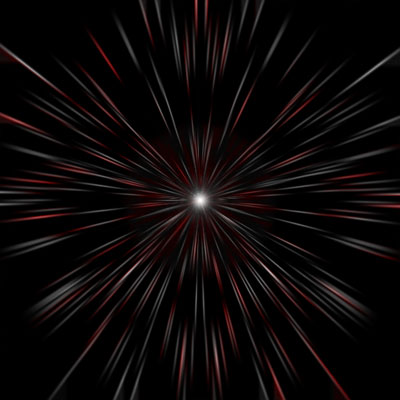
 Posted at dphotonews.com in Photoshop
In this tutorial you'll learn how to make a warp speed effect just like one from Star Trek.
Warp speed effect
Step 1
Create new document 300px x 300px, background white.
Step 2
Create new layer and fill it with white. Pick Marquee tool, select Fixed Size, Width 300px and Height 10px. Click somewhere on document. Now we have selection 300px x 10px.
Step 3
Go to the FILTER - NOISE - ADD NOISE and select values as I did

Step 4
Press CTRL + L on keyboard to go to the levels menu. Make histogram look like this:

Step 5
Press CTRL + T to transform selection. Pull the upper side of selection to the top of document and the bottom of selection to the bottom of document. Press ENTER when finished.
Step 5
Now we have to make our canvas a bit larger so we'll press CTRL + ALT + C (or go to the IMAGE - CANVAS SIZE) and enter values of 600px for height and 600px for weight and set anchor point like I did
Step 6
Copy our layer using CTRL + J. Apply transformation EDIT - TRANSFORM - FLIP HORIZONTAL. Move this layer to the left.
Step 7
Copy layer using CTRL + J. Apply transformation EDIT - TRANSFORM - FLIP VERTICAL. Move this layer to the bottom left corner.
Step 8
Copy layer using CTRL + J. Apply transformation EDIT - TRANSFORM - FLIP HORIZONTAL. Move this layer to the right. Whole image should look like this
Step 9
Merge down all the layers using CTRL + E. Final image should look like this

Step 10
Invert image using CTRL + I.
Step 11
Go to the FILTER - DISTORT - POLAR CORDINATES and select values as I did

Step 12
Go to the FILTER - BLUR - RADIAL BLUR and enter these values

Step 13
Copy this layer by pressing CTRL + J on keyboard. Set Blending mode of this layer to be Luminosity
Step 14
Now to coloring. Click bottom layer and press CTRL + U, select Colorize and set these values

Select top layer (the one which blending mode is Luminosity), press CTRL + U, once again select Colorize and set these values

Step 15
Click bottom layer go to the FILTER - BLUR - GAUSSIAN BLUR and set blur value to 2, then go to EDIT - TRANSFORM - ROTATE 90 CCW. Click OK
Step 16
Click top layer go to the FILTER - RENDER - LENS FLARE and set these values

Our final photo looks like this

author of this tutorial is Vladimir Markovic


No comments:
Post a Comment